Tuesday 26 May 2009

11. Fairing the Grainger Trimaran MTB920 Main Hull


Fairing the Trimaran main hull.
The west system fairing involves applying a light weight epoxy resin fairing compound with a notched plasters float, leaving lots of raised lines spaced about 50mm and about 3-4mm higher than the hull surface to cure hard. If the hull is not very fair then the height of the raised lines will be need to be increased. Once they were cured then I used a 1M long homemade long board with sanding paper attached to it and carefully sanded the tops of the raised lines of fairing down so that the where the overlaps in the glass were, the lines would be about 0.5mm and roughly about half the distance of the long board the raised lines would be deeper depending on how well the hull was made, and then progressively less height the further away from the fibreglass overlap you went. Essentially a fair surface is created across the tops of the railway lines.
With a flat float using the prepared raised lines as guides, I towelled on the fairing, filling in the spaces in-between the raised lines. I learnt not to play with the fairing too much as it only made the finish worse. Once the fairing was applied I let it cure, and then got the long board out again this time with finer grit to carefully sand the filler down to the railway lines, taking care not to take too much of them as that would essentially produce a hollow. After this coat cured, there were a few small local areas that need little more attention, but nothing much.When the fairing was finished the hull could then be turned over up right so that the temporary mould frames could be removed.

Saturday 23 May 2009

10. Applying west system and peel ply to fibreglass


Now that the main hull was fully planked up with DuraKore it really was looking like a boat, however I had to remind myself that this was only the core of the hull, the core between the fibre glass laminates on the inside and outside of the hull.
The next job was to remove the many hundreds of those screws that were put in to hold the DuraKore in place until the thickened epoxy resin cured, and every one of those hoes needed to be filled. Prior to laying any fibre glass and resin onto the hull, I sanded off very carefully the excess resin all over the hull taking care not to sand away any of the marine hardwood Gaboon veneers, as you will remember they are only 1.5mm thick.
I hate sanding, and fortunately after approximately 6 Duracore planks were edge glued and screwed to the mould frames, I went over the joints with a scraper removing excess resin before it hardened saving a lot of hot sweaty sanding time and cost of sand paper.
The next job was so welcomed, as I needed something different from edge gluing DuraKore strips to a mould.
The next job was to lay up the first layer of Fibre glass which consisted of only 1 layer of 270gm bi-directional glass fibre.
Fibre glass is supplied in several weave patterns. bi-directional as its name suggests, 50 percent of its fibres running the length of the cloth on the roll, and the other 50 percent across the width of the cloth, and its designed strength is in both directions. There are also some other fibres running across the width of the cloth are only there to hold the glass fibres together as a flat cloth so that we as the boat builder can easily lay the fibre onto the hull, without the fibres parting in every direction as the resin is rolled in. The weight 270gm is its weight per square meter, and reasonably light cloth, as DuraKore contributes so much to the strength of the hull in the fore and aft direction no glass fibre is required in that direction.


The Bidirectional glass was laid up 45 degrees to the planking, other words the fibres ran across the strip planking joints at 45 degrees to the joint. This laminate transfers the loads along the fibres in those directions that the DuraKore Gaboon hardwood fibres are not able to as they run the length of the hull, just as internal diagonal bracing does in the old timber constructed hulls.
I started approximately halfway down the Hull and simply draped a length of the cloth over the hull to the opposite edge at 45 degrees, and cut off the surplus close to the edges of the hull.


I mixed small amounts of Epoxy resin at first, about 5 pumps each of West System Resin and hardener and rolled that on with a standard paint roller used for oil based paints.
The temptation is to mix larger amounts, to save time mixing the stuff all day, but this resin generates heat once the hardener is added and stirred, and with larger volumes of epoxy resin in the container the greater the reaction and shorter the pot life. Before you know what has happened your hand is hot and the epoxy is hardening in the pot, as well as melting the plastic. I kid you not!

It is important not to roll too hard or too much as the glass fibres are reasonably brittle and can break therefore affecting the final strength of the laminate. It does not take too long to work out the best method to wet out the cloth. Some areas I found it easier to lift up the dry glass and wet out the duracore, then carefully lay the dry cloth over the wet hull while rolling a wet roller on top to spread the cloth wetting the glass onto the wet hull ensuring that there was no air trapped under the glass.
It may sound difficult but it certainly is not, it is just technique and practice and does not take too long before you are covering larger area’s fairly fast. You need to work reasonably quickly with the pot life in mind.

I only started to use release fabric once I started fibreglasing the inside of the main hull, up until them I did not know about it. After a couple of cloths had been laid onto the hull I laid a release fabric called Peel Ply, which really just looks and feels like nylon spinnaker cloth. It is not necessary but I recomend using it as it really improves the cured finish texture and helps to remove excess resin from the layup, when it is ripped off once the epoxy has cured. The best benefit for me was that as the release fabric was ripped off it also removed the bi products, waxes etc formed during the curing process that would otherwise need to be removed washing or by light sanding etc, which is extremely important before any other epoxy resin work or bond joints are made over top of cured epoxy surface. Sanding is not really recomended as the wax blocks up the sandpaper ver quickly leaving the sander ineffective.

This process was continued until the main hull was finished. I did all this work without any help, in fact the only help I asked for was when I needed to lift the deck, or out rigger hulls into a new position etc. Apart from that it is possible to build a yacht this size by yourself.

9. West System Epoxy Resin for my Grainger MTB920 Trimaran

The Epoxy resin that I chose to use was 105 West System manufactured by Gougeon Brothers, Inc.
I really like using West system as I learnt to use it for many different jobs on my Trimaran.

Not only was it used on the obvious fibre glassing work, but thickened up with additive powders it was used to bond in the bulkheads and furniture, as well as the final water barrier protection before applying the 2 pot undercoat and top coat paints.
I also fitted all my hardware fittings without having to use nuts and washers, as all that was required was too drill an oversized blind hole, fill it with a thickened epoxy resin mixture, place the fitting such as a winch over the filled holes, and drop the stainless bolts through the mounting holes into the epoxy filled holes. It is a superior methodof attachment to the conventional nut and bolt technology.This proved to be a fantantastic solution to preventing water leaking down through bolts into the hull or inside the hull etc. If used on wooden boats it would also prevent ingression of water rotting timbers etc.

The resin is a clear, light-amber, low viscosity epoxy that can be cured in a wide temperature range to yield high strength, rigid solid bond which has excellent cohesive properties and also is an outstanding moisture barrier.
There are two types of hardeners formulated for use with 105 resin.
205 and 206 hardeners require 5 part resin to 1 part hardener mixing ratio. 207 and 209 hardeners require a 3 to 1 ratio, and solid state 6 to 8 hours.
205 hardener is mostly used for general bonding, barrier coating and fabric application. It was also formulated to cure at lower temperatures and to produce a rapid cure that develops its physical properties at room temperatures. Its pot life is 9 to 12 minutes at 22 degrees C, and cures to solid state 9 to 12 hours.
The 206 hardener is a slower hardener and provides a longer working time especially when working in climates of higher temperatures. I tended to use mostly this hardener as its pot life is 20 to 25 minutes at 22 degrees C.
Special pumps can be purchased to dispense the correct amount of resin per 1 full stroke of the resin pump, and the correct amount of hardener per 1 full stroke of the hardener pump.Mixing containers can be bought, however being a scrooge I preferred to put my money into the boat and not the rubbish bin. I had my wife and our neighbours saving plastic milk bottles and other suitable containers for me. My supply of milk bottles was insane at times. I cut the tops off those to make suitable containers.

8. DuraKore strip planking the Grainger MTB920 Trimaran bilges


Laying the DuraKore onto the temporary hull mould frames progressed fairly quickly. I had both sides done in less than 2 months of spare time around a full time job.
I was racing against the seasons, as I needed to be at the fibre glassing stage during summer, so that the west system resin could cure properly in suitable temperatures. Fibre glassing was to be another first for me, apart from a few small repair jobs on previous yachts.
You can see by the photograph that I had deliberately left the bottom of the hull until both sides were completed.
This was because that area had the most curvature and in my mind it was not going to be easy. So while working on the sides I was mentally working out how I was going to attack the bottom of the hull.
Most of the sides were done with 50mm width strips, and the flatter areas were planked with 75mm strips.
I found that I had to cut various sized strips for the bottom, but predominately they were approximately 25mm strips.
This was a lot more work, as there was more cutting, edge gluing and screws to be screwed in, but too me the best way to produce a nicely curved hull shape.
A tip
In hind sight I should have investigated using a staple gun to hold the strips on. The staples could have been fired in through a piece of plastic placed over the top of the DuraKore strip, which then could be used to pull the staple out after the resin had cured.

All the strips were cut with a skill saw set up to follow a fixed stationary straight edge 10M long.

7. DuraKore strips aligned to the hull mould


As the Durakore strip planking process progresses and you need to plank around tighter curved areas such as the bilges, then some dress making skills are required.
Due to the limitations of how much the strips could take up the shape of the hull, some strips needed to be cut to suit the line alignment of the next plank.
I did this by laying a second strip over the full length of the hull, butting the ends against the temporary screwed plank, allowing the strip to run where it naturally wanted to bend around the shape of the hull.
I then traced with a pencil where the edge of the second strip wanted to sit over top of the temporary screwed plank.
I wished I had a photo of that part of the operation, as it is really easy but difficult to describe simply. However the photo to the right will show how the strips were cut to run into each other. This may help.
Hopefully I do not make this too confusing. Basically I would lay the new strip on the edge of the strip already fixed to the hull mould. I would then draw a pencil line in behind the new strip following the top fixed strip edge, to produce the tapered edge to enable to new strip to fit into the tapered gap that had to be filled. Confused, well please take a good look at the photos.
The most important thing I realised here is to take care in the alignment of the strips, so that the strips appear to lay flat and fit perfectly over the entire hull, without any humps or hollows, or being twisted like a propeller blade to lay over the hull mould frames.
It is best to just cut them in allowing the strips to flow into the hull, without unduly forcing them.
This part of the project took me approximately 2 months of spare time after work and full weekends around the clock. There were no recreational days. At the end of this stage of my Trimaran project I was rewarded with a very fair looking hull, it looked good but I had so much more to do.

6. West system resin to edge glue DuraKore strip planking


Now that I had a stock of 50mm x 13mm x 10m plus planks prepared, I was ready to screw the first plank onto the temporary male mould frames. A power screw driver was real handy for this job, as there were thousands of screws to be screwed in, temporarily holding the plank in position while the west system, brand of slow curing epoxy resin cured.
I need to use slow curing west system epoxy so that I could get several planks edge glued and installed onto the hull mould frames, as well as temporary plywood battens screwed across the planks to support the planks in the unsupported areas between the mould frames. You can also see the battens in the photos.
I did all this by myself with no volunteers; it is possible when you set up correctly.
The first plank placement is the most important, as this positioning will be the difference in how all the other planks lay up around the hull frames. Basically you lay the plank onto the hull into the lowest point in the curve along the entire hull or the highest point along the whole hull, and visualise how the next planks will look and sit before selecting the position to screw the first plank on. Some planks will be expected to lay up with a slight twist like a propeller blade, following the hull shape and they can only take a limited amount of flex.
It is not wise to make them lay across the mould frames unnaturally.
The photo demonstrates where I started with my first plank.
Epoxy resin and west system filler powders are mixed to a peanut butter like consistency and then applied to one edge of the fixed plank.
Then the 2nd plank is lifted up and placed against the glued edge and then screwed in place. This job goes on and on until the entire main hull is fully planked up.
After a few planks are edge glued and fitted, I made sure to scrap off all excess resin to save myself a lot of sanding later on.
Remember that DuraKore is only the core, just as foam or divinycell etc are an alternative core material for hulls.

5. Grainger MTB920 Trimaran built with DuraKore planking


Now that the temporary frames were all set up and secured in place, Paula and I held a long board over several frames at a time to see how a Durakore strip plank would look when screwed to the frames, just as a final check to make sure that there were going to be no humps or hollows in the finished hull due to poor temporary frame measurements or cut out.
The 9.2 Meter hull was now ready for the DuraKore planks, but the Durakore was only 2.4 meters long and too wide at 300mm.
DuraKore is a marine grade composite of Baltek end grain balsa bonded in between 2 veneers of marine Gaboon hardwood, providing strength to weight ratio far superior to any traditional method of one off construction.

My next job was to splice those 2.4M planks together to at least 10 meters or longer, and then cut those planks up into suitable strips so that as they could be edge glued and screwed to the male mould frames to form a round bilge hull, and not an obvious multi chined hull shape.
The spliced joint made (male to female) was a 1 in 12 taper cut across each of the hardwood veneers.
Effectively you end up with a tapered male edge, with the marine hardwood veneers tapered down to the edge of the balsa core.
The female joint is obviously the opposite, as the balsa core is machined out a distance equal to a 1 in 12 taper of the hardwood veneers.
I’ll explain, if the hardwood veneer is 1.5mm thick then a 1 in 12 taper will cause a tapered edge to be 1.5mm x 12 = 18mm long. Therefore the balsa removed from between the hardwood veneers will be 18mm deep.
You can see the female joint in the attached photo.
And you will now see that the matching male edge is tapered out to 18mm to accept the female edge.
This 1 in 12 taper splice produces a joint equal if not stronger than the uncut hardwood. West System sells a scarfing tool that can be attached to any Skill saw to do this machining job very easily.
I made a flat “table” area along side one side of the hull, which I could glue and join the planks together, and that they would be perfectly flat long planks (at least 10M or 11M) once the west system epoxy resin was cured. I did not want to make strips which are bent at the joints. That would also have resulted in a hump or hollow to fix up later.
The reason why I made these strips much longer than the hull, was that it is important to stagger the spliced joints. It would be a potentially weaker core if all the strip joints were aligned together.
Once I had glued up a lot of 9.2 meter x 300mm planks, I then sliced them up into approximately 50mm width strips, with a skill saw.
The photos show a pile of those durakore strips ready to be edge glued and fitted to the hull mould.

4. Hull mould and datum waterline set up


After couple of days later all 14 temporary hull mould frames were cut out, and were ready to be installed onto the strong back.
The photo to the right shows the temporary frames set up on the strong back inside the shed.
The strong back had to be marked out for the position of each of those mould frame stations.
Then to help accurately align each mould frame, a piano wire was set up set up on the centre line of the strong back, and about 25mm clear of and above the strong back.
I used a piece of angle iron bolted to each end of the strong back so that the piano wire could be pulled very tight and tied off once it was level. The point to note here is that you do not want any sag in the piano wire, or your boat hull will have sag in the middle built into it.
I bought a line level that just hooks over the piano wire. It is a simple tool, and does not cost much.
Then all the datum waterline heights marked on the mould frames were then set up the same distance above the piano wire.
A long accurate builder’s level was also used to check that each mould frame was standing up perpendicularly to the piano wire at 90 degrees, using the vertical centre line marked on each station for the level.
A Builders Square (used horizontally against the hull mould frame) was used to check that each mould frame was horizontally 90 degrees to the piano wire.
All this care in setting up is extremely important if the hull is to be perfectly fair (smooth without humps and hollows). It will certainly pay off with a hull fairness that you can really be proud of.
Then after all those set up operations were completed a laser level was hired to do the final check, and then the temporary frames were finally screwed securely in place so that they would not move under the weight of the hull as it was built over this male mould.

3. Grainger MTB920 Hull mould frames


The prospect of building this Grainger MTB 920 Trimaran was exciting, and waiting for the boat plans to arrive had me prancing around like a caged lion.
The plans arrived, and I spent a few days figuring out where to start, and what to do next.
These days some home builders would probably purchase mould frames that have been cut out by computer aided laser cutting methods, which ensures greater accuracy for each mould frame or as known on the plans as station mould frames. They were available when I started but my budget was too small to employ others to do what I could learn and gain experience in doing.
Tony provided an A4 page of offsets which I had to mark out on the particle board, effectively marking out in full size the shape of each section of the main hull. An offset is a measurement from the centre line. It will become clear as we continue.
All of these terms such as offsets did not mean too much to me, until I decided before hand to read and learn about boat building. The terms sound scary but certainly are not and I will simply explain some of these throughout this blog.
Each of the stations has a vertical centre line, and a horizontal datum water line.
The datum water line or DWL is where the hull will float, it is where the designer has calculated the hull to float with all its designed equipment and number of people loaded on board etc.
Both of these lines had to be marked onto the particle board and must also be drawn at 90 degrees to each other, accurately. In fact every line must be drawn accurately.
From the vertical centre line along each water line I measured out towards where the outside of the hull was going to be with the measurement known as the offsets.
For example Tony Grainger’s offsets would show the waterline WL200, which has been marked 200mm above the Datum water line DWL, to have offsets each side of the centre line at say 350mm. I marked WL200 at 350mm with a pencil mark forming a cross.
Parallel to the datum water line were other parallel waterlines spaced at 200mm intervals above the DWL. As an example WL400, WL600 etc. The offsets were applied to all of these as well.
What I ended up with was a lot of crosses which could then be joined up together forming the outside shape of the hull.
Then from the intersection of some of these waterlines and the vertical centre line, was several extra lines were drawn at specified angles towards where the outside of the hull would be. These lines are named diagonals. Their purpose is to provide more location points, filling up the space between the waterlines measurements with lots more little crosses, therefore providing more accuracy in drawing the outside of the hull.
After drawing the outside edge of the hull shape, I then had to subtract 13mm for the thickness of the duracore which was the core of the hull sandwiched between layers of fibreglass.
After all the offsets were marked up, then all that was left to do was join up the crosses , and then cut the hull shape out using a jig saw. 13 station frame later and I was ready to mount these onto the strong back.

2. The Trimaran boat build shed


It was autumn and the he first job build a shed, using the cold months of winter to get the mould frames set up so that I could start using epoxy resin and fibreglass to build the boat when the seasons were warm enough to cure the resin. I planned the project around the seasons, so that I always had something that could be done. Progress could not be prevented in my plan.
We moved to Roxburgh, about 1-1/2” hours from Queenstown in the South Island of New Zealand during the summer December 1989. A lovely little town on the side of a river between two large ranges.
It was a country town, with 3000 people on the side of the Clutha River, and a 320 megawatt power station where I worked as an area operator in 1990.
During the summer the temperature can get into the high 30 degree Celsius. The following winter was the coldest on record since the second world war at a low of minus 28 degrees and never got above minus 5 for approximately 7 seven weeks.
So I definitely required a shed!!
I begged and borrowed from some locals for corrugated roofing iron, and only had to buy some 100mm x 100mm x 6M posts and battens for the roof. Begging is something you become good at as a home yacht builder.
While the locals spent their winter days inside next to the roaring fires, I was seen outside building my boat shed. My ears, nose and hands were constantly cold. I reckon they must have thought I was madly insane, they were correct. Everything was constantly white because of the cold, including the coal pile.
Once the shed was built, I had to build a strong back, to support the mould.
This is a solid frame or platform on which the temporary frames and the male mould for the main hull was to be built. The timber for this frame was 200mm x 50mm non treated pine. I concreted stumps into the ground, to provide a solid base that would not move, and built the strong back onto the stumps. This can be seen in the photo of the shed.
The most important thing I learnt from very good tradesmen when serving my time as an apprentice Fitter turner Machinist is that if you start off rough, the job will finish rough. No matter what you try and do later with a rough job it will always finish as a compromise, so always start off with as perfect a job as you can and your boat will look like the panels on a brand new car. No humps or hollows, and minimal filler.
I developed excellent skills as an apprentice and take pride in whatever I do.
I set up the strong back dead level in every direction. This was to be the birth of my Trimaran project.

Tuesday 28 April 2009

1. Trimaran Project 9.2M Grainger MTB


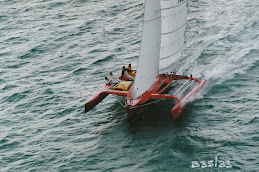
The photo displayed is of a Trimaran I built from scratch as an amateur boat builder.
It was my first Trimaran building project; some would practice on something much smaller in case it turned out to be a disaster. But not me that was only a distraction from what I knew I wanted to do. I was impatient and did not have time to waste on a smaller project.
Now for some back ground before I get into the project. (1-1/2” pages of back ground that is all)

To go directly into the project then click onto the Archive window to the right of this page and click May and you will see the list of pages numbered in order. These will be added to monthly.

I am married with 2 children and a very patient and lovely wife. We have been living in Melbourne Australia for almost 9 years now, and really love Melbourne for all it offers, trees, parks, stadiums, trams, trains to the foot of the stadiums etc, Philip bay is nothing compared to Auckland’s Hauraki Gulf and it’s many islands, but it has salt water and that is OK.
New Zealand is where we were born and raised; it is a beautiful country, with many of the best sailing waters in the world. Gulfs, bays and harbours full of islands etc. It also has some of the best inland scenery in the world. However home is Australia, we love this very big dry island and gum trees, and our children are certainly Australian now, it where they have done most of their growing up.
We moved here nearly nine years ago, when I was given the opportunity to transfer from N.Z. to Melbourne with the company I was employed Parker Hannifin.
The boat building project was really a seed that was evident when I was approximately 10 years old. I built a balsa Trimaran power boat. Electric motor powered by small torch batteries. From what I remember it looked really fantastic.
When I was 11 yrs old and wandering along the banks of the Hatea river in Whangarei, North Island of N.Z. I noticed an old man working on a steel skeleton frame of a yacht on a slipway. It was not long that he gave me a job tying chicken mesh to the rusty rod steel frames. As that mesh was tied on layer after layer, the boat really started transforming in front of my 11 year old eyes into a real monstrous yacht.
Several weeks later I stood by and watched as a team of plasterers applied the fero-cement plaster to the chicken mesh, pushing it through the mesh and smoothing it off on both sides. The transformation was complete, and my dream began.
I was involved with an old P Class that was rotten, but I managed to block some of the holes with pieces of wood and 4” steel nails. I progressed to racing on Hartley 16ft and Hartley 18ft trailer sailers. That is where I caught the racing bug, and then bought a laser 2, the design has a trapeze and spinnaker. They can fly when set up well.
I raced the laser 2 at Weymouth yacht club, while also racing other days on various other Keller's until I ended up sailing on Innismara, a 67ft strip planked Kauri yacht built, owned designed, built and raced by Bernie Schmidt.
Bernie was an optician, and obviously had an eye for fast reaching and downwind hull designs. He was 67 years old when I joined his crew of 13. It was his seventh yacht that he had designed and built and also raced. Innismara was designed by being carved and shaped from a 3ft block of wood. He Bernie then cut the finished model up into about 12 sections, so that he had the shape of the hull for 12 sections along its length. He then used a yard rule and scaled each of those sections up to the full size yacht that floats today. No real drawings were ever drawn.
Initially it was going to be 60ft to match Ranger, a very well known racer built approximately 1936, on the Auckland harbour, but Bernie’s laminated Kauri keelson ended up being longer due to the planks he had, so rather than wasting the extra timber he stretched his frames out to a 67ft yacht. He was a seat of the pants guy, and full of many stories. In the 1920s he raced an 18ft skiff in Sydney and was the first Kiwi skiff to beat the Aussies at their sport. They presented him with a beautiful “silver Skiff trophy” which sits in the Tamaki Yacht club today. He was still discussing ideas for a new design up to the day he died. Swinging keels, and more rocker in the keelson etc. Some people use swinging keels now. What a fantastic man to have known and sailed with.
I left the crew and bought my first keeler a Hale Wagstaff 24ft ¼ tonner. My wife and I and crew raced her for a couple of seasons and did very well from the first race. She was a great powerful windward boat, and very forgiving. We sold that to build a house, and have our first child a lovely daughter Vanessa.
Well this is where the Trimaran story begins.
When single and with my sister on the Queensland coast in Australia while on holiday I spotted a very lovely looking trimaran flying along faster than everything else on the water. It was Riverside Oats a Tony Grainger Designs yacht. http://www.graingerdesigns.com.au/
Well that memory was festering away in me, especially now that I was land locked and not sailing.
I talked about it with Paula my wife, told her what my materials list added up to etc. She told me that as long as it did not cost much more than that I should do it and get it out of my system.
Guess what, I was out by over double the price. I had no idea of what expense I was getting us into.In my next blog we will start the process of building the shed and strong back for the male mould of the main hull.